Mapping Child Components
The previous tutorial sections covered the best ways of defining reactive, and re-usable Components. This section covers how to effectively put together a VirtualInstance tree by instantiating child VirtualInstance under a parent.
Observable Children
In previous sections, we saw the third argument of Dex.New/Dex.Clone
Dex.Premade can be used to create child VirtualInstance when a root/parent
object is rendered.
In many cases of a UI's design, a VirtualInstance may need to have child instances created, destroyed, and modified based on the current state of the application. In the same way that an observable can be passed to the properties table of a VirtualInstance, an observable can also be passed to the children parameter of a VirtualInstance:
local function ItemList(props: {
    items: Dex.Observable<{Dex.VirtualInstance}>
})
    return Dex.New("Frame", {
        Size = UDim2.fromScale(0.4, 0.6),
        SizeConstraint = Enum.SizeConstraint.RelativeYY,
        AnchorPoint = Vector2.new(0.5, 0.5),
        Position = UDim2.fromScale(0.5, 0.5),
        BackgroundTransparency = 1,
    }, props.items)
end
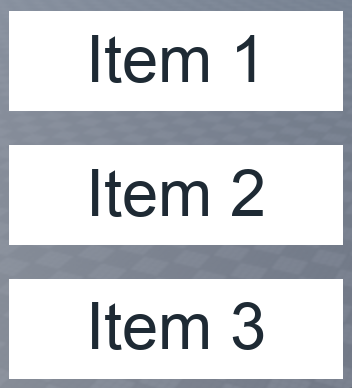
When an observable is passed to a VirtualInstance's children parameter, Dex will automatically create/destroy instances as needed to match the new value of the observable list whenever it changes:
local items = Dex.State({} :: {Dex.VirtualInstance})
local list = ItemList({
    items = items
})

-- . . .

items:Set({
    Dex.Clone(game.ReplicatedStorage.UITemplates.Item, {
        Text = "Item 1",
        Position = UDim2.fromScale(0.5, 0.3),
    }),
    Dex.Clone(game.ReplicatedStorage.UITemplates.Item, {
        Text = "Item 2",
        Position = UDim2.fromScale(0.5, 0.5),
    }),
    Dex.Clone(game.ReplicatedStorage.UITemplates.Item, {
        Text = "Item 3",
        Position = UDim2.fromScale(0.5, 0.7),
    }),
})
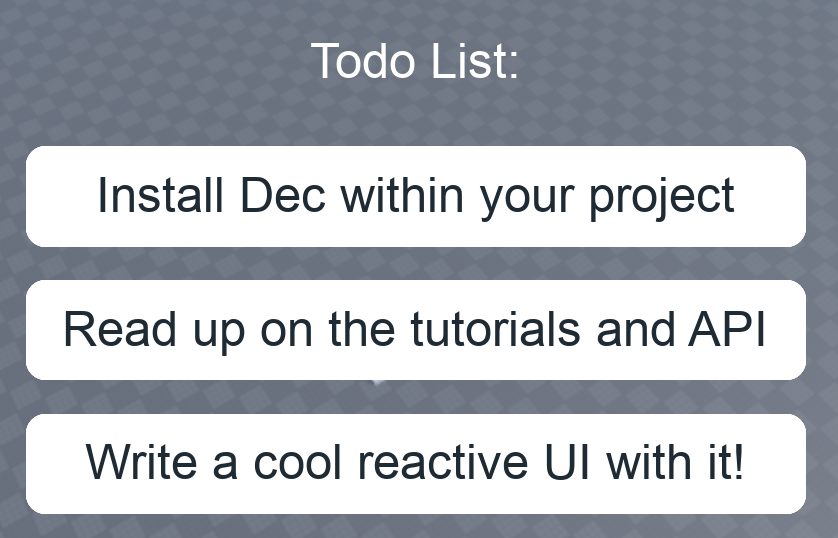
When generating multiple child VirtualInstances, it is recommended you use Observable Mapping to generate instances dynamically based on another table state (like a list of strings):
local function TodoList(props: {
    items: Dex.Observable<{string}>
})
    local children = props.items:Map(function(currentItems)
        -- Begin creating a list of children
        local childList = {
            -- Layout constraint
            Dex.New("UIListLayout", {
                SortOrder = Enum.SortOrder.LayoutOrder,
                HorizontalAlignment = Enum.HorizontalAlignment.Center,
                Padding = UDim.new(0.05, 0),
            }),
            -- Heading
            Dex.New("TextLabel", {
                Text = "Todo List:",
                LayoutOrder = 0,
                TextSize = 18,
                Size = UDim2.fromScale(1, 0.15),
                BackgroundTransparency = 1,
                TextColor3 = Color3.fromHex("fff"),
            })
        }

        -- Generate a new child VirtualInstance for each todo item
        for i, description in currentItems do
            table.insert(childList, Dex.New("TextLabel", {
                Text = description,
                LayoutOrder = i,
                TextSize = 18,
                Size = UDim2.fromScale(1, 0.15),
                BorderSizePixel = 0,
                BackgroundColor3 = Color3.fromHex("fff"),
            }, {
                Dex.New("UICorner", {
                    CornerRadius = UDim.new(0.2, 0)
                })
            }))
        end
        return childList
    end)

    return Dex.New("Frame", {
        Size = UDim2.fromScale(0.7, 0.6),
        SizeConstraint = Enum.SizeConstraint.RelativeYY,
        AnchorPoint = Vector2.new(0.5, 0.5),
        Position = UDim2.fromScale(0.5, 0.5),
        BackgroundTransparency = 1,
    }, children)
end
(Then, to instantiate the TodoList component):
local function Gui()
    local todoItems = Dex.State({} :: {string})
    local list = TodoList({
        items = todoItems
    })

    -- . . .
    todoItems:Set({
        "Install Dex within your project",
        "Read up on the tutorials and API",
        "Write a cool reactive UI with it!",
    })

    return Dex.New("ScreenGui", {ResetOnSpawn = false}, {list})
end
:AddChildren() Directives
Let's briefly go over a feature of VirtualInstances: Directives.
VirtualInstances have special methods on them called Directives, which are instructions of how Dex should put together the instance heirarchy when reconciled by a Root object. If you've followed along with the guide so far, you have actually been using two directives under the hood already: :SetProperties() and :AddChildren()!
-- Creating a VirtualInstance with "Properties" and "Children" tables defined:
local virtualInstance1 = Dex.New("Frame", {
    BackgroundTransparency = 1
}, {
    Dex.New("TextLabel")
})

-- . . . Is equivalent to adding a "SetProperties" and "AddChildren" directive!
local virtualInstance2 = Dex.New("Frame")
virtualInstance2:SetProperties({
    BackgroundTransparency = 1,
})
virtualInstance2:AddChildren({
    Dex.New("TextLabel"),
})
Under the hood, when passing the "properties" and "children" arguments to the VirtualInstance constructors, Dex is actually adding the directives :SetProperties() and :AddChildren() to the new VirtualInstance.
Please note that VirtualInstance directives should only be called within the same scope that the VirtualInstance is created in!
If you attempt to add a directive to a VirtualInstance after it has been rendered, Dex will produce an error. In addition to this, directives can be added to a VirtualInstance, but never removed. Changing the visual output of a VirtualInstance should always be done by using Observables.
:MapChildren() Directives
In the previous examples, Dex automatically deletes all child instances and re-creates new ones every time the children observable changes. In most cases, however, you probably only want to create new child instances when an item is added to a list, and destroy old ones when an item is removed from the list.
Dex provides the :MapChildren() method for this very common use case!
local function TodoList(props: {
    items: Dex.Observable<{string}>
})
    local listFrame = Dex.New("Frame", {
        -- . . .
    })

    -- . . .

    listFrame:MapChildren(props.items, function(i, description)
        return Dex.New("TextLabel", {
            Text = description,
            LayoutOrder = i,
            TextSize = 18,
            Size = UDim2.fromScale(1, 0.15),
            BorderSizePixel = 0,
            BackgroundColor3 = Color3.fromHex("fff"),
        }, {
            Dex.New("UICorner", {
                CornerRadius = UDim.new(0.2, 0)
            })
        })
    end)

    return listFrame
end
:MapChildren() takes an input list observable (such as items, which is an
observable list of strings), and generates child VirtualInstances for each item
in that list. Unlike the :AddChildren() directive, :MapChildren() only
creates and destroys children when a specific key/value pair is added, changed,
or removed:
task.spawn(function()
    while true do
        todoItems:Set({
            "This label is never destroyed since it never changes!",
            "This label gets destroyed once removed from the list.",
        })
        task.wait(4)

        todoItems:Set({
            "This label is never destroyed since it never changes!",
        })
        task.wait(4)
    end
end)
Optimizing With :MapChildrenByValue()
In the example above, a label is created for every unique key/value pair, and only as needed. There is, however, one problem in this example: if you added an entry to the beginning of the list and shifted all of the todo items by 1 index, the keys would change for each value, even though the value stays the same.
To illustrate this problem, let's explicitly define the index for each item
in the todoItems state:
-- 3 key/value pairs are added, so 3 instances get created:
todoItems:Set({
    [1] = "Foo",
    [2] = "Fighters",
    [3] = "Baz"
})

-- 1 key/value pair is added, so only 1 instance gets created for Qux:
todoItems:Set({
    [1] = "Foo",
    [2] = "Fighters",
    [3] = "Baz",
    [4] = "Qux"
})

-- All 4 key/value pairs have changed, so 4 instances are destroyed and
-- 3 instances are unnecessarily re-created:
todoItems:Set({
    [1] = "Fighters",
    [2] = "Baz",
    [3] = "Qux"
})
(Each TextLabel is assigned a unique color to demonstrate creation and destruction)
In addition to :MapChildren(), Dex also provides the directives :MapChildrenByKey() and :MapChildrenByValue(), which behave in slightly different ways:
- MapChildren creates a new instance for every key/value pair. If a key or value is ever changed, the instance assigned to that key is destroyed and a new one is created in its place. The mapping function takes in a Key and Value as parameters.
- MapChildrenByKey Creates a new instance for every key, but does not destroy the instance if the value for that key changes. The mapping function takes in a Key and an Observable Value as parameters.
- MapChildrenByValue Creates a new instance for every value, but does not destroy the instance when the key referring to this value changes. The mapping function takes in a Value and an Observable Key as parameters.
In this case, the TodoList can be best optimized by implementing
MapChildrenByValue:
local function TodoList(props: {
    items: Dex.Observable<{string}>
})
    -- . . .

    listFrame:MapChildrenByValue(props.items, function(description, i)
        return Dex.New("TextLabel", {
            Text = description, -- string
            LayoutOrder = i,   -- Observable<number>
            TextSize = 18,
            Size = UDim2.fromScale(1, 0.15),
            BorderSizePixel = 0,
            BackgroundColor3 = Color3.fromHex("fff"),
        }, {
            Dex.New("UICorner", {
                CornerRadius = UDim.new(0.2, 0)
            })
        })
    end)

    return listFrame
end
This will optimize cases where items are shifted in the list, but are not removed, by only creating the child instance once for each value:
-- 3 values are added, so 3 instances get created:
todoItems:Set({
    "Foo",
    "Fighters",
    "Baz"
})

-- 1 value (Qux) was added, so only 1 instance gets created:
todoItems:Set({
    "Foo",
    "Fighters",
    "Baz",
    "Qux"
})

-- 1 value was removed, so only 1 instance gets destroyed:
todoItems:Set({
    "Fighters",
    "Baz",
    "Qux"
})
(Each TextLabel is assigned a unique color to demonstrate creation and destruction)
Optimizing With :MapChildrenByKey()
An equally viable option for optimizing the TodoList component is by mapping
children by key instead of by value:
local function TodoList(props: {
    items: Dex.Observable<{string}>
})
    -- . . .

    listFrame:MapChlidrenByKey(props.items, function(i, description)
        return Dex.New("TextLabel", {
            Text = description, -- Observable<string>
            LayoutOrder = i,   -- number
            TextSize = 18,
            Size = UDim2.fromScale(1, 0.15),
            BorderSizePixel = 0,
            BackgroundColor3 = Color3.fromHex("fff"),
        }, {
            Dex.New("UICorner", {
                CornerRadius = UDim.new(0.2, 0)
            })
        })
    end)

    return listFrame
end
(Each TextLabel is assigned a unique color to demonstrate creation and destruction)
In this example, instances are generated based on the number of TextLabels needed. When value at a specific index is changed, the Text property is updated reactively.
There are pros and cons to each child mapping approach, so whether you map by key or value, or both, is up to your component's design needs.
This section, we covered Directives and how they can be used to set properties and add children to a parent instance. Next section will go over more VirtualInstance directives, and how each of them can be used to meet specific use cases in UI development.